Sunday, January 6, 2013

Why? Winter Crossing of Antarctica

Map Of Route - October 2012Why would you do it? Cross Antarctica in winter when everything freezes and the air is too cold to breathe?  The usual Brit rationale - "science", which ended up with Robert Falcon Scott dead and Shackleton a hero for saving the lives of his teammates.  Edward J. Larson explores that history in his excellent An Empire of Ice, `Scott, Shackleton and the Heroic Age of Antarctic Science'.  I love the Shackleton story but prefer the Amundsen approach - get there and get back.  The great Norwegian got to the South Pole and sailed the northwest passage.
So now the great British expeditionist Sir Ranulph Fiennes has organized a mission to cross the continent in winter.  The Vendee Glove reminds me that everything breaks.  And when it breaks in the Antarctic in winter what do you do?  The Coldest Journey tells the story.  And the expedition blog will chronicle it.  the fun starts now.

Saturday, January 5, 2013

Restored Bronx Marsh Destroyed by Sandy

A marsh restoration project just north of North Brothers island has been destroyed by hurricane Sandy's 13 foot tidal surge.
OAK POINT, EAST RIVER, THE BRONX
Then

And now

Tuesday, January 1, 2013

Shanghai's New Year's Light Show

Shanghai's spectacular New Year's Eve light show.  China invented gunpowder and fireworks.  Today the pyrotechnics are done digitally.  It takes place on The Bund - the river walk in downtown Shanghai.  And yes, there's a countdown!

Monday, December 31, 2012

Sunday, December 30, 2012

After the storm - Friendship, Cushing and Thomaston

Friendship (lobsterman's wharf and traps), Cushing (Salt Pond, South Cushing Baptist Church, Acorn Grange No. 418), and Thomaston (Town landing - St. George River) [click pix to enlarge and for slideshow]


A Room of One's Own - Cave Dwelling

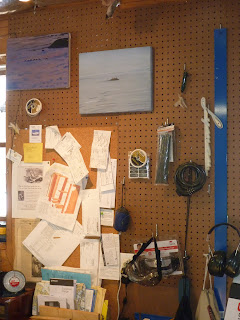
My room.


Saturday, December 29, 2012

Dusk before the storm.- Friendship, Maine

Friendship Harbor at dusk, an hour after the snow began to fall.  December 29, 2012


Happy New Year

Happy New Year!  Stay Warm!
- George & Marilyn


Tuesday, December 25, 2012

New Mast - Sitka spruce


scarph - 12/1 ratio


Pat Montalbano, the fine boat builder at Barron's Boatyard on City Island has built a new mast for my Buzzards Bay 14 - North River 2 which was dismasted in the September 2012 storm. It is a 24 foot, tapered, glued wooden box mast made of Sitka spruce.  The joints types are rabbet and feathered edge scarph.  The glue is West System G Flex.  That glue held when I was dismasted.  The wood split, not the joints.
A guy I found on a chat room Boatdesign.net, T Cubed says: Box masts are easy. Well, conceptually, but not in practice.  T Cubed has a lot of good advice. (beow)  Pat set up on a solid, level surface = a 2x8 plank, right next to the re-assembled broken mast so he had a full scale model right there.  Above  are some shots of Pat's work:

T Cubed's work plan: Get your work surface true and straight and draw on them marks to follow when gluing. If you use work horses get a half dozen of them and use wedges and taut string to get it all straight mark the horses (As in the mast needs to go exactly between this mark and that mark on each one).
Draw chalk around each leg so if you nudge one you'll know about it and you'll also know where it should go. Set up on a hard surface.
Don't use fat bulkheads inside the mast as they create 'hard spots' that actually make it weaker and add weight. Minimal bulkheads made of thin stuff is fine.
It is very much worthwhile to rabbet each side of front and back planks so the side planks have somewhere to press against when you clamp it all together . Once everything is lubed up with epoxy and you're working against the cure time clock you'll be glad you remembered the 6 P rule.
(6P rule ; proper preparation prevents piss poor performance)
Make a scarph box and scarph up the four planks first into their full lengths. Then work in all the tapers paying close attention to precision. Rabbet crisply where needed. Setup everything. Mark everything. Have twice as many clamps as you think you'll need , even if they're jury rigged clamps. (rope, sticks, wedges) Don't forget lots of plastic shopping bags to place between clamps and glue (plastic bags release well from hardened epoxy).
Do a mock run with your helpers to make sure there are no glitches.
Then glue it all up in one go with slow epoxy. Do a final check by sighting along it that it is indeed true and straight, as you still have a ton more clamps to place and a few more minutes of working time. It should be perfect since you set up the guiding marks with care.
If it ends up with a half inch of (it should not if you did everything right) curve, don't get depressed, it will not make the slightest bit of difference."