Live. 1966
I hear he opened for Dylan and for Nina Simone!
Nobody Loves you When You're Down and Out


Length: 11’ 0” || Beam: 3’ 10 ½”
Draft, board up: 0’ 5” || Draft, board down: 1’ 11” || Weight: 95 – 120 pounds
Sail areas: Gunter rig: 55 sq. ft. || Lugsail rig: 49 sq. ft. || Sprit rig: 49 sq. ft.
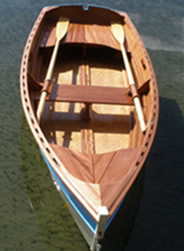
Sand Dollar is designed for the first-time builder, including those with no previous woodworking experience. She is a flat-bottomed skiff, with lapstrake sides. The bottom and sides are marine plywood, glued and screwed to a simple framework. As with the Penobscot 14, I took great pains with the lines, building a model to refine the shape. The result is a very pretty, practical little boat that will satisfy both the novice and experienced boat builder.
I included some innovations in the construction method, that made it possible to include some details that have the look of the craftsman's work, but which are really very easy to do. One is to install the seats before the side planking, which avoids having to cut them to fit inside the boat, as you would if they were installed later. I also developed very simple methods for cutting and fitting other parts that add so much to the boat's appearance.
Sand Dollar is a delight to build, and versatile on the water. She is a pleasure to row, and handles beautifully under sail. She is great for daysailing or fishing, and of course you can put a small outboard on the transom if you wish.
THE PLANS
I have tried hard to make the plans the most complete and detailed that you can buy. There are 15 sheets of drawings, including construction drawings, full size details, and sail plans, and a large sheet of full size patterns, showing the stem, transom, bulkheads, and building frames. This is printed on Mylar, which is very accurate, and stands up much better than paper to the rigors of workshop use. Being transparent also makes it easier than paper to use. There is also a complete building manual, illustrated with numerous drawings and photographs, which takes you step by step through the whole building process. It also includes a materials list and cutting schedule, a section on sharpening your tools, and sources for hardware you will need.
THE VIDEO/DVD

The two hour video/DVD takes you in great detail through each stage of building the boat. There are numerous close-ups, showing exactly how to get good results with some of the jobs that may be new to you. The video/DVD finishes with some great shots of the boat under sail and oar.
TOOLS, MATERIALS, COSTS, AND BUILDING TIME
You need a very basic set of woodworking tools to build Sand Dollar. These include a hand plane, a set of chisels, handsaw, and measuring tools. The essential power tools are an electric drill and a jigsaw. A list of necessary tools, with recommendations on which are most suitable, is given in the building manual.
I know he's a crank. but.. he sounds great and he's a great bandleader.
That's life...

During the last quarter of the 19th century and the beginning of the 20th century, Nathanael Greene Herreshoff designed some of the most complex, graceful, and ultimately successful racing and pleasure yachts in existence. Part of his genius was to also apply these same design skills to smaller and simpler craft such as the Fish class, the ubiquitous Buzzards Bay 121⁄2, and the object of my affection (and this discussion), the Biscayne Bay 14. Apparently, only about a dozen of these sailing skiffs (model 908) were ever produced by the Herreshoff Mfg. Co., all in the 1920s.
After retiring (for the first time) in 1998, I built a pair of Biscayne Bay 14s (BB14s): mine, named MR.BILL, and one for a friend. My habit of building two at a time came from my own apprenticeship in the 1970s with master craftsman Gary Kincaid. This approach spreads the costs, shares skills and space, and can offer you a willing companion for adventures after launching day. I recommend the concept of “building buddies.”
My decision to build a BB14 was based on its heritage, performance, low cost, and ease of transport. Another plus is the optional use of modern materials to create a strong hull that can be day-sailed directly from the back- yard to the water. The choice has proven to be a good one for me. During the past decade, MR. BILL has sailed waters ranging from the Gulf of Maine to Buzzards Bay.
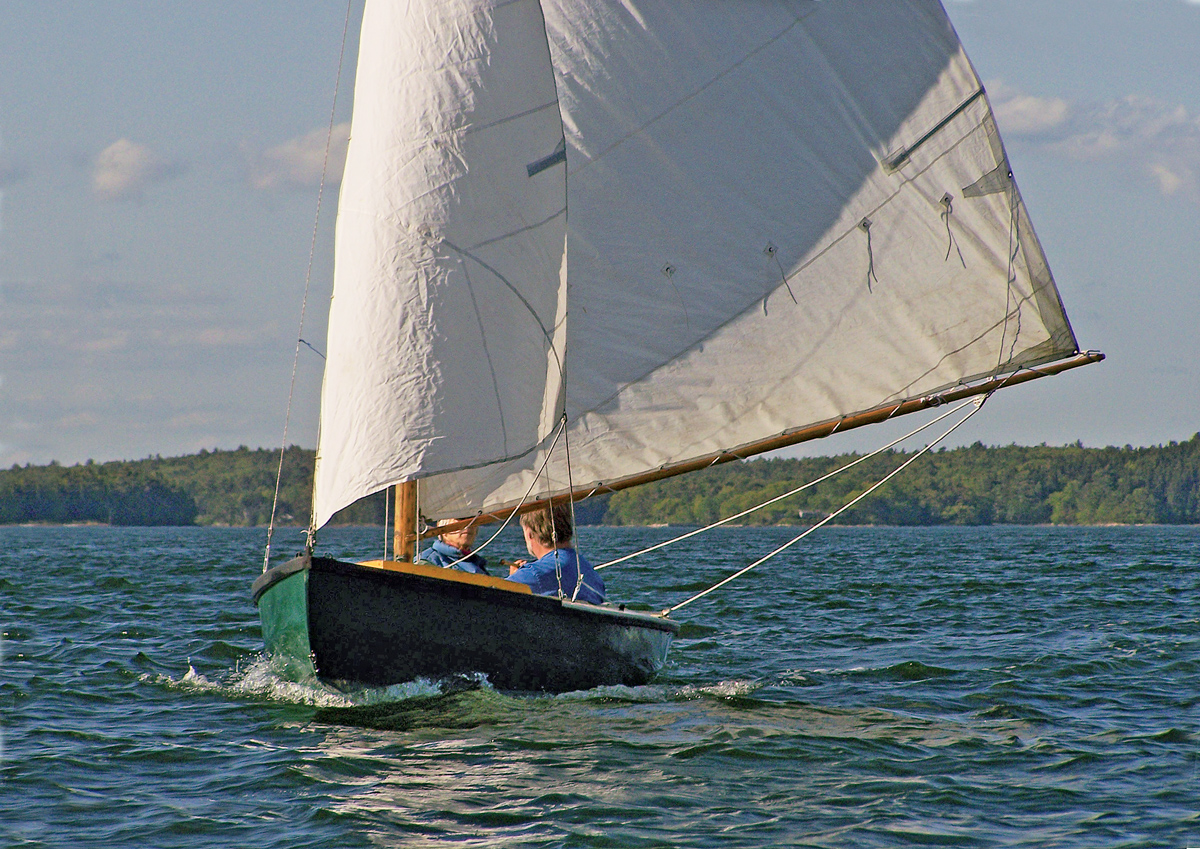 Photo by Darin Carlucci
The Biscayne Bay 14, designed by N.G. Herreshoff, is a delightful, low-cost daysailer that transports easily and is a good performer. Jim Austin built his for exploring Muscongus Bay, Maine, with his wife, Darcy.
The plans for the BB14 as sold by WoodenBoat are complete and are backed up by an optional handbook taken from step-by-step construction articles, including lots of helpful photos. There is the choice to build the boat with a fixed keel, which would probably improve windward performance over the shallow keel/centerboard option that we chose. With the centerboard, MR. BILL nests snugly onto a small trailer for easy transport.
Although perfect as a singlehander, the BB14 often carries my wife as well as me over the waters of Maine’s Muscongus Bay, allowing us to explore the mouth of a small creek, run up on the beach for a picnic, or slide gracefully down the faces of ocean swells coming in past Monhegan. But don’t be fooled: this idyll comes at a price. The BB14s were designed for the warm, shallow waters of Florida, and there they will perform wonderfully. However, up in New England, you must pick your weather carefully and be prepared for a refreshing splash or two when beating to windward. I’ve added a V-shaped coaming forward of the mast to aid in deflecting the icy water before it reaches me or the cockpit. Since we chose the centerboard option, the next time I retire we could easily tow MR. BILL south to a place where the temperature more closely approximates our age.
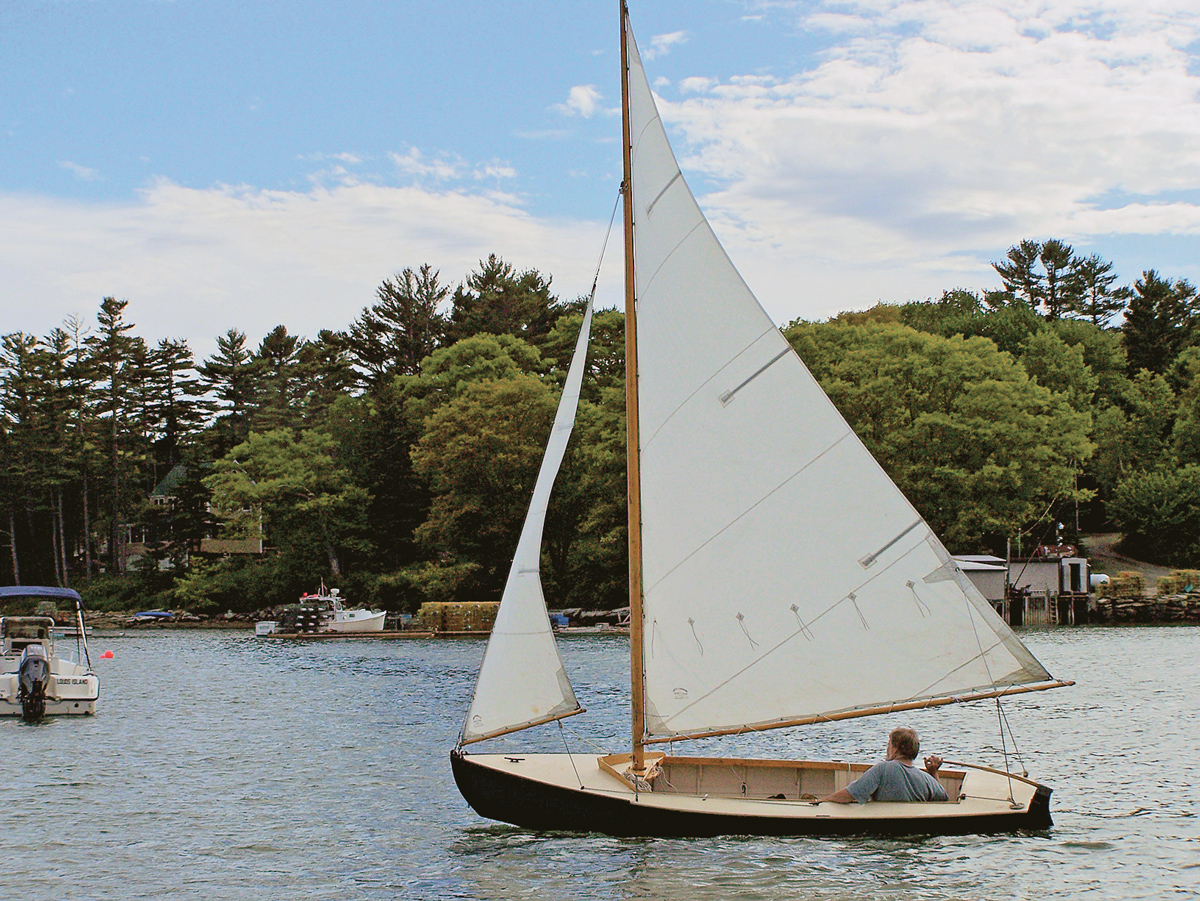 Photo by Darin Carlucci
The Biscayne Bay 14 is a great design to build as plans indicate or to modify according to individual use.
Construction of the shallow keel with centerboard slot is challenging. The shape is well defined in the plans and a mold is not too difficult to build, but if you’ve never melted lead before, it could be a daunt- ing prospect and best left to a professional. For the rest of you pirates, there’s treasure in old chimney flashing, used tire weights, bits of plumbing—or an old, abandoned iron bathtub in which to melt all this material. The process of casting is well detailed in easily accessed articles and books (see WB No. 89).
The hollow mast is fun to build as described in the plans. I used carefully chosen and dried lumberyard spruce 2×4s, 2×6s, and 2×8s, as they make a strong, light-weight stick, which has never failed me in years of hard use. There are other spar-building techniques such as “bird’s mouth” (see WB No. 149) that can be used if you love more complex geometry.
The BB14 design calls for a watertight compartment forward of the mast. As a longtime builder, I dislike parts of a boat that are inaccessible. As a long-time sailor, though, I love the idea of flotation in small boats. My solution was to create a space under the foredeck with an opening and an air bag. The bag can be inflated during use, and deflated and removed for inspection and maintenance. I keep a small picnic anchor and rode in the same space, which helps add a little weight forward to keep her nose in the water when going to windward.
To build my BB14, I used marine-grade Okoume plywood, local oak and spruce, bronze fastenings, and epoxy. My favorite tool for cutting plywood is a 31⁄2″ 9V-battery-powered circular saw outfitted with a plywood blade (for a thin kerf). The saw’s lightweight makes it quite handy, although you may want a backup battery for extended cutting. Finish was mostly marine paint with some show-off varnish on spars and coamings. All these materials have held up well with proper annual maintenance.